Sunday, March 3, 2024

Welcome Spring

 Hello crafty friends,

I am here today for the inspiration for Robin’s Creative Store.

As we are welcoming Spring and I have made floral card to bring a smile on your faces.

How beautiful it is to add our dewdrops to cards. it always gives a fresh feel and look to the cards. Here we go with process steps.

Step 1: Take a A2 size cardstock as base. For the card front i have embossed using embossing folder..

Step 2: Then comes flowers and fillers - For flowers & fillers - i have used diecuts from honeybee stamp dies. I have used chipboards from Wycinanka.

Step 3: Diecuts are coloured with Archival Inks and shaped into the flowers.Then added clear dewdrops to the centre of the flowers

Step 4:Now it’s time to assemble the card. I have layered the chipboard over the embossed card front and added some coconut fibres. Then arranged the flowers

Step 7:   Finally add the dewdrops- clear dew drops from our store.(links are below) and sentiment and butterflies


Products from our store
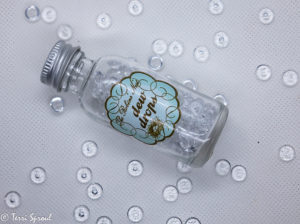
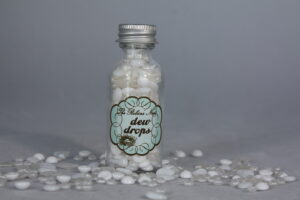
Clear dew drops


I hope you enjoyed my card today! I am always happy to hear from you.

Thank you for spending your precious time with us.

Shylaashree

Monday, February 26, 2024

Altenew Hennah elements card

Hello crafty friends, 


 I was so fascinated when Altenew launched Hennah elements stamp set. Years after i got this stampset through destash from a crafty friend. But somehow this stampset didn’t got my attention as it was hiding with other brands. Yday I reorganised my stamp collection and i was wondering how I have missed to use this beautiful stampset. 

Then the hennah magic happened to create this beautiful card. I have kept the background to white to add beauty to the Hennah elements.

For this card i have taken A2 size cardstock as base. For the card front, i took a scallop rectangle diecut. Over the diecut, i added borders with paisley stamp 

Then stamped the flower stamp from Hennah elements stampset on the white cardstock and coloured it with zig watercolour markers.


Then layered the flowers and fillers to the corners and decorated the card with Robin’s Nest Creative dew drops and enamel dots.


Finished the card by adding diecut sentiment from Altenew Majestic blooms.

I hope you enjoyed my card today!  Thank you for stopping by!  


Submitting this card to Altenew inspiration challenge


If you liked this card and want some more crafty inspiration, don't forget to check out my INSTAGRAM feed!

Friday, February 23, 2024

Floral greeting card

  Hello crafty friends,

I am here today inspirations for Robin’s Nest creative and today I bring you bouquet of flowers cards to cheer-up your loved ones for extended for valentines day celebration.

Handmade flowers are something special that you bring out from your heart. Adding dewdrops to cards always elevates the beauty of the cards. Here we go with process steps.


Steps involved in making of this card are below

Step 1: Take a A2 size cardstock as base. For the card front i added the pattern paper as base and over layered with additional pattern paper and keep it aside.


Step 2: Then comes flowers and fillers - For flowers & fillers - i have used diecuts from craftpassion and fantasy dies. I have chipboards from Wycinanka.

Step 3: Diecuts are coloured with Archival Inks and shaped into the flowers of my desire.


Step 4:Now it’s time to assemble the card. I added another layer of pattern paper to uplift the floral arrangement.

Step 5:i added the laced heart diecut at the back and layered flowers and fillers over it.

Step 6:Then added the dewdrops- Forest brown and clear dew drops from our store.(links are below)

Step 7:Further decorated by adding decostones , sentiment and butterflies.

Products from Robin’s nest creative store

Solid colour dew drops – Forest brown 

Clear dew drops

I hope you enjoyed my card today! I am always happy to hear from you. 

Thank you for spending your precious time with us.

Shylaashree